 Save to Pinterest
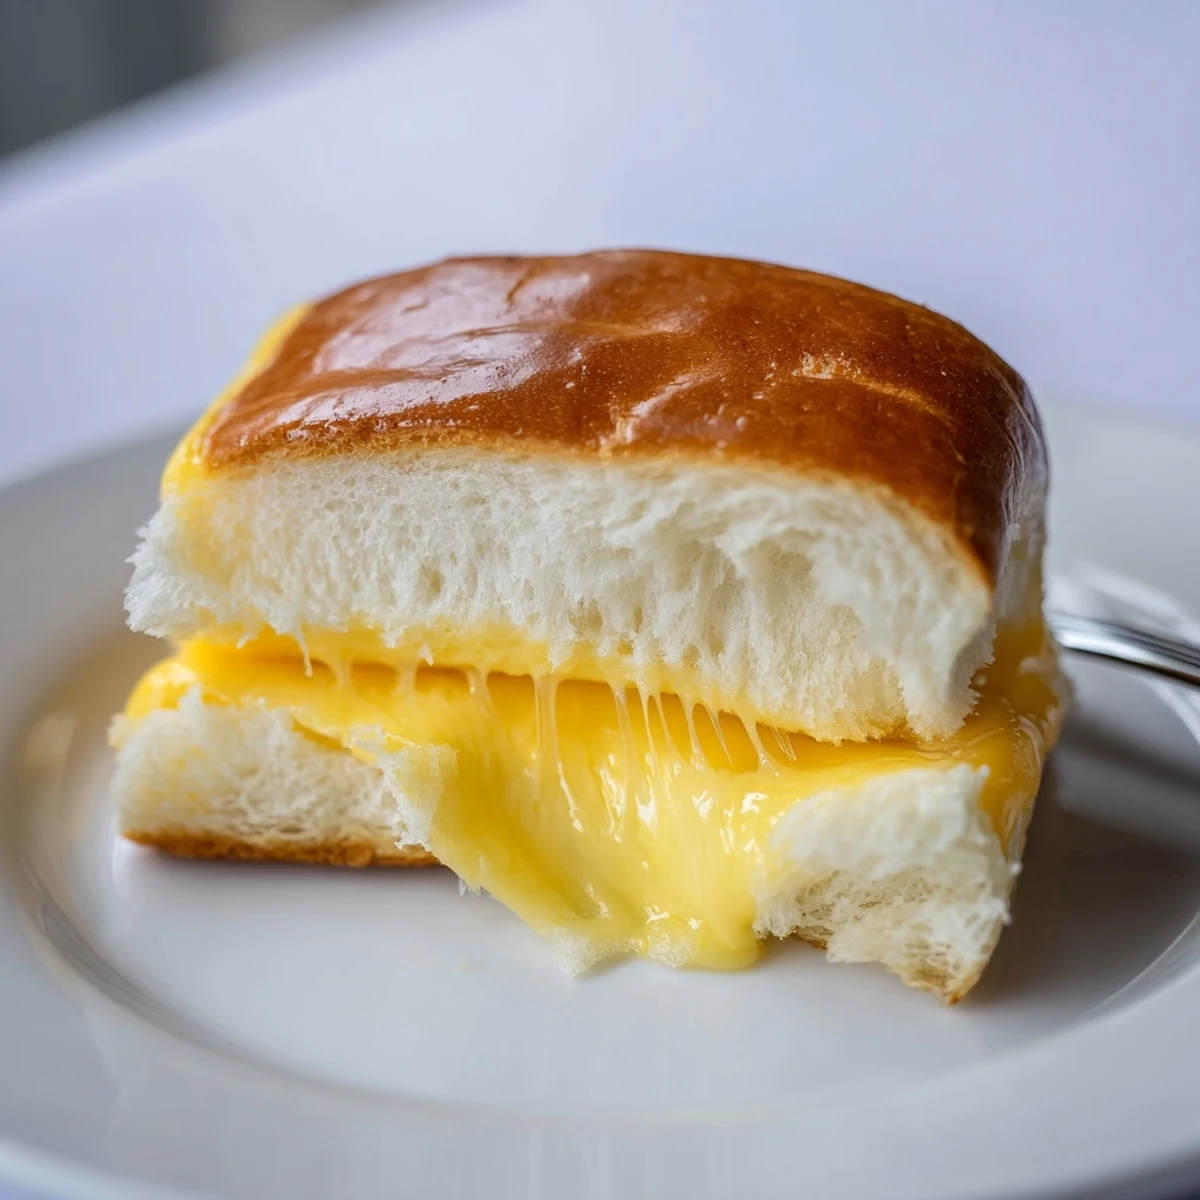
 These mini grilled cheeses use a 12-count pack of sweet Hawaiian rolls layered with 8 oz sliced cheddar and optional deli meat. Slice the roll block in half, add cheese (and ham if using), brush tops with melted butter mixed with mustard, honey and garlic powder, then bake at 350°F for 10–15 minutes until cheese melts and tops brown. Makes 12 warm handhelds in about 25 minutes; try Swiss, provolone, or pepper jack and add tomatoes, bacon, or caramelized onions for variety.
Trying to keep everyone entertained on a rainy Saturday often turns into spontaneous kitchen experiments, and that's exactly how these mini grilled cheese Hawaiian rolls first appeared in our house. The sweet smell of melting butter on those pillowy rolls was enough to lure my family into the kitchen before I'd even finished assembling them. It was one of those happy accidents—just a craving for something warm, handheld, and a little playful. These cheesy bites have since become our go-to for last-minute gatherings or after-school surprises.
There was one afternoon when I made these for a movie night with friends, and laughter practically bounced off the walls as we each grabbed a steaming, gooey sandwich from the tray. No one could resist having just one, and I ended up making a second batch mid-show because they disappeared so quickly. Sharing these simple treats instantly made the night feel a bit more special, like a secret you hope never runs out.
Ingredients
- Hawaiian sweet rolls: Their soft texture and gentle sweetness create a uniquely comforting bite, and I’ve learned cutting the whole block slab-style saves loads of time.
- Sliced cheddar cheese: Cheddar melts beautifully, lending just enough sharpness to cut through the sweet rolls; thicker slices mean extra-gooey sandwiches.
- Unsalted butter: Melted for brushing on top, it helps create that irresistibly golden, crispy crust—don’t skimp here.
- Deli ham or turkey (optional): For a heartier version, these tuck in nicely and add a savory twist without overpowering the cheese.
- Dijon or yellow mustard (optional): This sneaky layer of tang brings a grown-up zing that even picky eaters will love.
- Honey (optional): A drizzle can double down on the signature sweetness—perfect for a brunch-y vibe.
- Garlic powder (optional): Just a sprinkle over the top for a fragrant, bakery-style finish you’ll remember.
Instructions
- Prep and preheat:
- Start by preheating your oven to 350°F (175°C) and line your baking sheet with parchment paper so nothing sticks and cleanup takes seconds.
- Slice the rolls:
- Use a serrated bread knife to effortlessly halve the rolls horizontally, keeping them intact in a single block—it feels almost like splitting a giant cake layer.
- Layer in the fillings:
- Lift off the top slab, arrange the bottom half on your tray, cover every inch with cheddar, and tuck in ham or turkey if you’re using it; it’s the secret to edge-to-edge meltiness.
- Cap and brush:
- Place the top rolls back, press gently, then combine melted butter with any add-ins (mustard, honey, garlic powder) and lavishly brush it all over for flavor in every bite.
- Bake to golden perfection:
- Slide the tray into the oven and wait about 10–15 minutes, or until the cheese bubbles and the tops turn gorgeously golden brown—it smells like pure comfort.
- Serve and enjoy:
- Let cool for a brief two minutes before slicing into individual sandwiches—watch out, as the hidden cheese makes every pull satisfyingly stringy.
 Save to Pinterest
 One evening, my niece—usually a cheese purist—decided to 'help' and sprinkled a bit of garlic powder on top. The whole room filled with a bakery-fresh aroma, and suddenly everyone insisted on a garlicky batch from then on. It’s funny how that tiny addition flipped this from 'snack' to 'something to rave about' with no extra fuss at all.
Swapping in Your Favorite Cheeses
I once raided my fridge and used a mix of provolone, Swiss, and a leftover pepper jack slice, which somehow made each roll taste slightly different—like a flavor adventure in one pan. It’s an easy way to keep things interesting, especially if your cheese drawer is always in flux.
Party-Ready in No Time
Batching these for guests means you barely need extra effort; just double or triple the recipe and they’ll still bake up evenly. The best part is setting out the tray and stepping back to hear everyone’s happy reactions as they tear into the warm rolls.
Making It Your Own (and Quick Serving Tips)
I’ve learned you can pile on extras like thin tomato slices or some caramelized onions, and these little melts only get better. They’re also perfect dunked into warm tomato soup or served as a casual appetizer at any time of year.
- Cut straight through with a sharp knife so all the gooey cheese stays inside.
- Customize the brushing mix—try Italian herbs or a pinch of smoked paprika for variety.
- Prep ahead, refrigerate assembled rolls, and bake right before serving for the freshest batch.
 Save to Pinterest
 Whenever I serve these, someone inevitably asks for the 'secret.' Usually, it’s just a smile and letting them in on how easy it truly is. May your batch bring just as much laughter and warmth to your table.
Recipe FAQs
- → Can I make these ahead of time?
-
Assemble the sandwiches up to the point of baking, wrap tightly, and refrigerate for up to 24 hours. Bake just before serving to retain the golden top and melty cheese.
- → What's the best cheese to use?
-
Cheddar gives classic flavor, but Swiss, provolone, or pepper jack work well. Choose a cheese that melts smoothly for the best gooey result.
- → How do I get a perfectly golden top?
-
Brush the tops with melted butter mixed with a touch of mustard, honey, or garlic powder, then bake until the tops turn golden brown. A quick broil for 30–60 seconds helps, but watch closely.
- → Can I make a vegetarian version?
-
Yes—omit the deli meat and add fillings like sliced tomatoes, caramelized onions, roasted peppers, or sautéed mushrooms for extra flavor and texture.
- → How should leftovers be stored and reheated?
-
Store cooled sandwiches in an airtight container in the fridge for up to 3 days. Reheat in a 350°F oven or toaster oven until warmed and the cheese becomes gooey again; avoid microwaving to keep the tops from becoming soggy.
- → Can I change the sweetness level of the rolls?
-
If you prefer less sweetness, choose plain slider buns or brush the tops with a savory butter mix (skip honey) to balance the roll's flavor.
