 Save to Pinterest
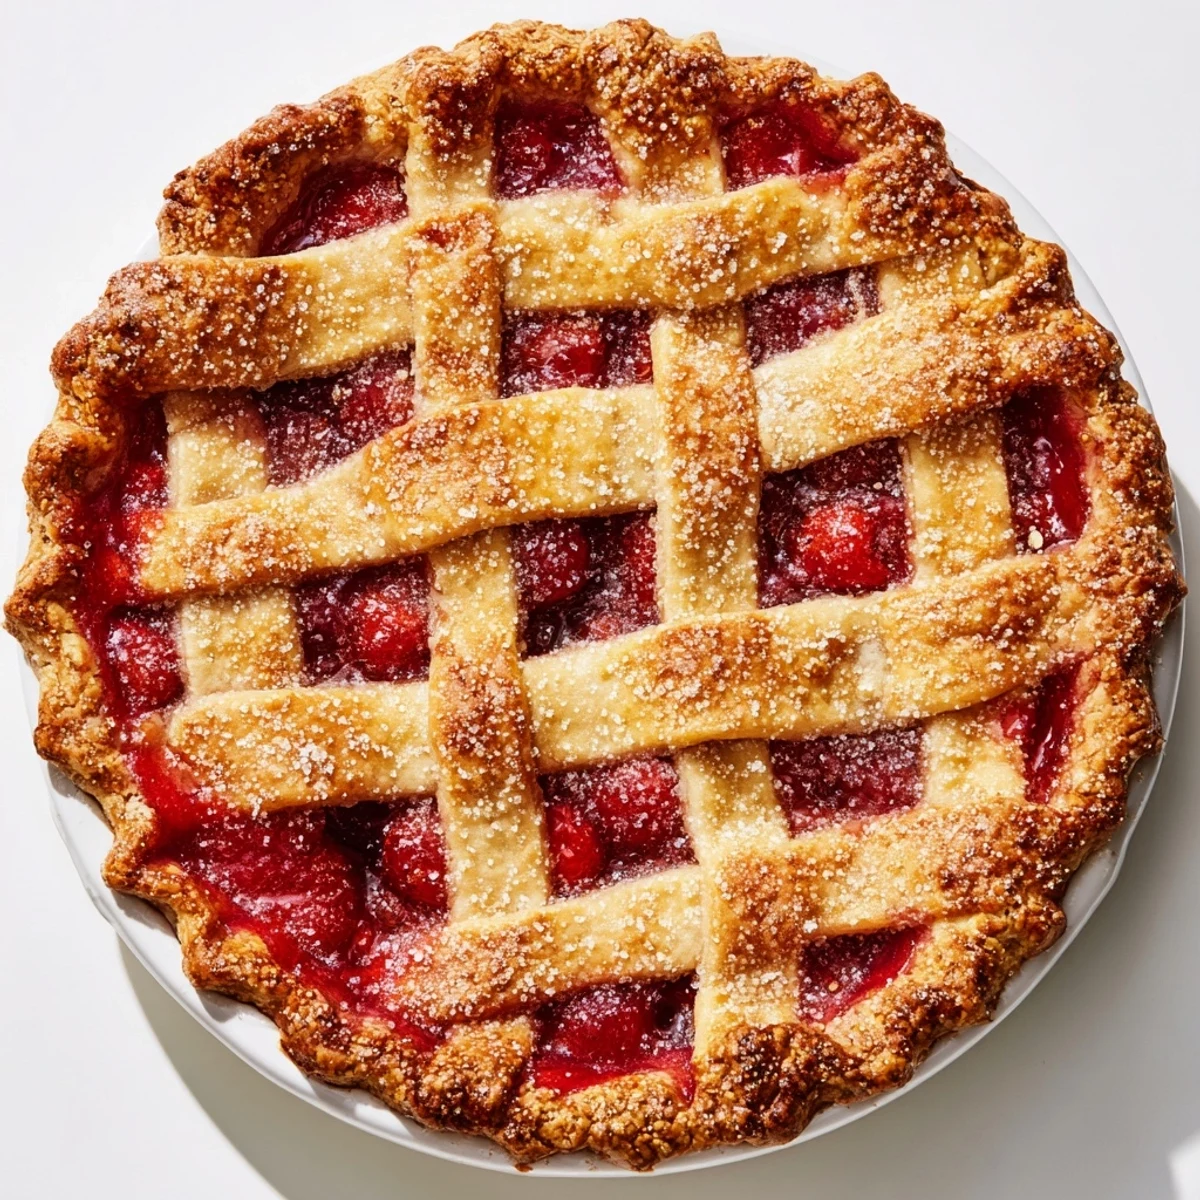
 This classic cherry dessert combines a flaky, buttery lattice crust with a vibrant, tart-sweet cherry filling. The crust is made from cold butter and flour, rolled into discs and chilled before use. Fresh or frozen cherries are mixed with sugar, cornstarch, lemon juice, and almond extract to create a balanced filling that thickens during baking. After weaving the crust strips into a decorative lattice, an egg wash creates a golden finish. Baked until bubbling and golden, it’s best served cooled and pairs beautifully with vanilla ice cream or whipped cream.
The kitchen was filled with the scent of butter and warm cherries the first time I attempted a lattice crust. My roommate walked in, declared it looked like something from a bakery window, and then proceeded to eat three slices while watching movies. That pie became our go-to celebration treat for years afterward, appearing on birthdays, bad days, and random Tuesday nights when we needed something sweet.
I made this for my parents anniversary dinner last summer, timing everything wrong and frantically weaving the crust while guests arrived. Mom walked into the kitchen, saw flour everywhere and my panic face, and simply started helping weave the strips. We finished it together, and somehow that slightly imperfect, made with love version became the new family legend.
Ingredients
- 2 1/2 cups all-purpose flour: The backbone of your crust, and I have learned the hard way that measuring by weight gives much more consistent results
- 1 cup unsalted butter, cold: Keep this ice cold, straight from the fridge, because warm butter means tough sad crust instead of flaky wonderfulness
- 1/4 cup granulated sugar: Just enough sweetness in the dough to balance the tart cherries without making it cloying
- 1/2 tsp salt: Do not skip this, it is what makes the crust taste like something instead of just bland paste
- 6 to 8 tbsp ice water: Start with less and add only what you need, you want the dough to just hold together when squeezed
- 5 cups fresh or frozen pitted cherries: Fresh are amazing in season but frozen work beautifully, just do not thaw them first or they will release too much liquid
- 3/4 cup granulated sugar: Adjust this depending on how sweet your cherries are, taste one first and trust your instincts
- 1/4 cup cornstarch: This is what transforms that juicy cherry mess into a sliceable pie that holds its shape
- 1 tbsp lemon juice: Brightens everything up and keeps the filling from feeling one note sweet
- 1/4 tsp almond extract: The secret ingredient that makes cherry filling taste professional and complex
- 1 egg, beaten: For that gorgeous golden finish that makes people think you spent hours on this
- 1 tbsp milk: Thins the egg wash just enough for easy brushing
- 1 tbsp coarse sugar: Totally optional but adds this sparkle and crunch that takes the presentation over the top
Instructions
- Make the dough foundation:
- Whisk flour, sugar, and salt in a large bowl, then work in that cold butter with your fingers or a pastry blender until it looks like coarse crumbs with some pea sized pieces remaining. Add ice water gradually, tossing gently until the dough just holds together when you squeeze it in your hand.
- Let it rest:
- Divide the dough in half, press each into a disc, wrap them separately, and chill for at least an hour because this relaxes the gluten and makes rolling so much easier later.
- Prepare the cherry filling:
- Toss all those beautiful cherries with sugar, cornstarch, lemon juice, almond extract, and salt until everything is evenly coated, then set aside while you roll out the crust.
- Roll the bottom crust:
- On a floured surface, roll one disc into a 12 inch circle, moving the dough frequently to prevent sticking, then carefully transfer it to your 9 inch pie pan and let the edges hang over the sides.
- Add the filling:
- Pour all those cherry goodness into the bottom crust, mounding them slightly in the center since they will settle during baking.
- Create the lattice strips:
- Roll the second dough disc into another 12 inch circle and cut it into half inch strips, using a ruler if you want them perfectly uniform but honestly I prefer the slightly rustic handmade look.
- Weave the lattice:
- Lay half your strips across the pie horizontally, spacing them evenly, then fold back every other strip and lay a vertical strip perpendicular before folding back the horizontal strips, repeating this over under pattern until you have woven all the strips.
- Finish the edges:
- Trim the overhang, tuck the edges under themselves, and crimp them however you like or press them down with a fork to seal everything together.
- Add the finishing touches:
- Brush that egg and milk mixture all over the lattice and edges, then sprinkle with coarse sugar if you want that bakery sparkle.
- Bake until golden:
- Start at 400 degrees for 20 minutes to set the crust, then reduce to 350 degrees and bake another 35 to 40 minutes until the filling is bubbling vigorously and the crust is deeply golden.
- The hardest part:
- Let this cool completely on a wire rack, at least 3 to 4 hours, because slicing too early will give you a beautiful but runny mess instead of those perfect clean slices.
 Save to Pinterest
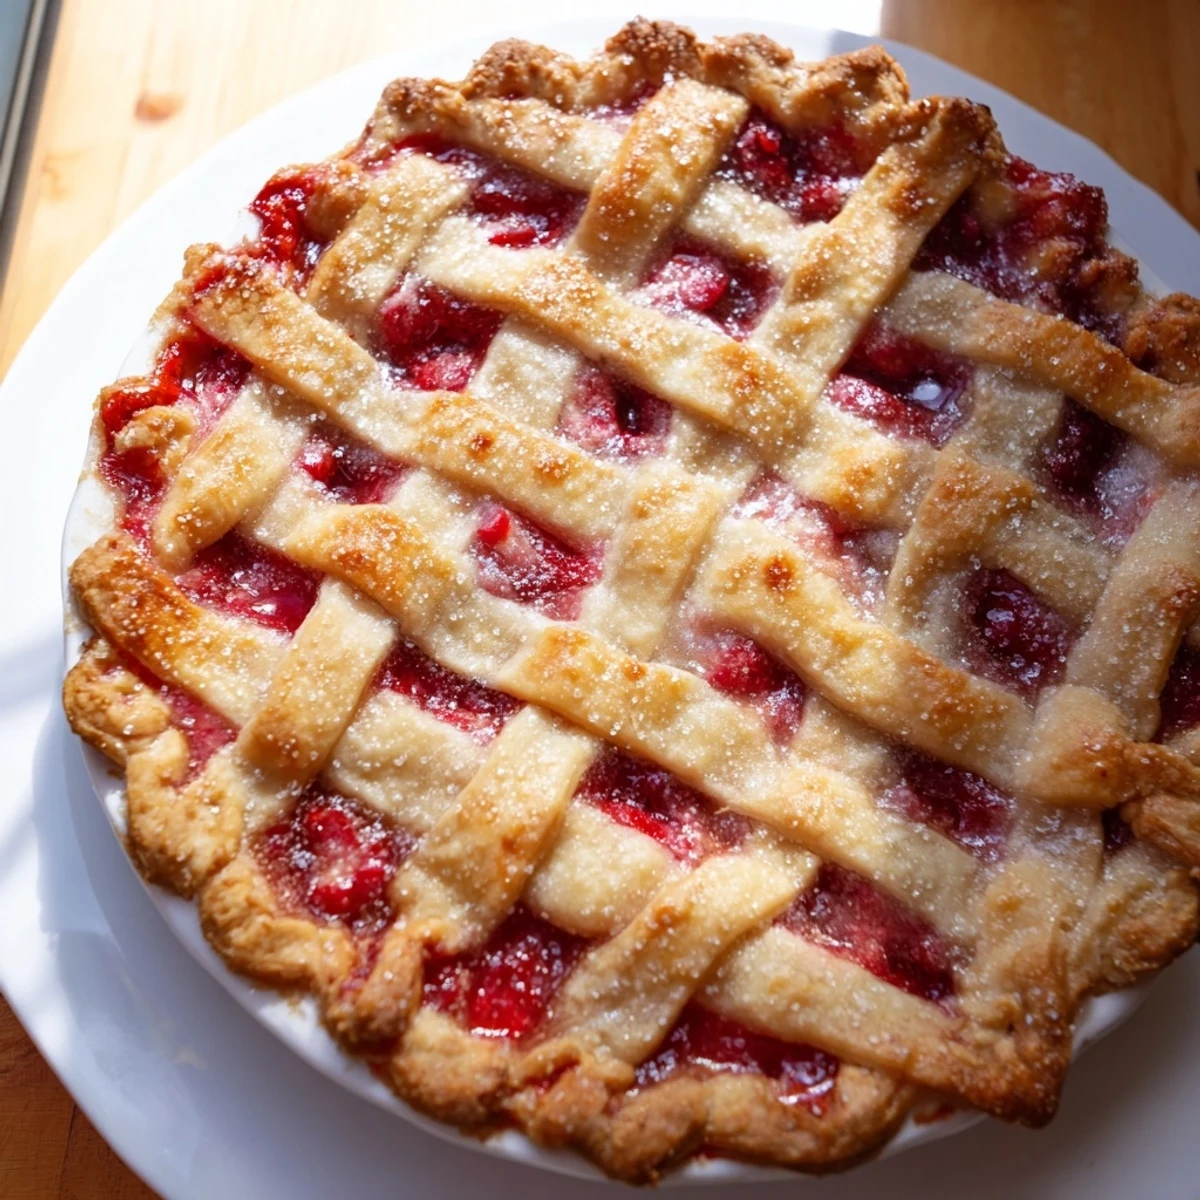
 My daughter asked to learn lattice weaving last summer, and we spent a messy afternoon with flour everywhere, strips sticking to everything, and both of us laughing until our sides hurt. Her first attempt was gloriously uneven and she declared it the most beautiful pie she had ever seen because she made it. Now whenever she visits, we make this together, and somehow the imperfections make it taste even better.
Making Ahead Like A Pro
You can make the dough up to three days ahead and keep it wrapped in the fridge, or freeze it for up to three months if you want to get a head start on future pie cravings. The filling can also be mixed and held at room temperature for about an hour, though any longer and the cherries will start releasing too much liquid before they hit the oven.
Choosing The Right Cherries
Fresh cherries in season are obviously ideal, but I have made this with frozen cherries countless times and honestly cannot tell much difference in the final result. Just remember to use them frozen straight from the bag, because thawing them first creates way too much liquid and you will end up with a soupy pie instead of that perfect sliceable texture we are after.
Serving Suggestions
Warm slices with vanilla ice cream are basically mandatory in my house, but I have also served this with lightly sweetened whipped cream and a pinch of cinnamon. For a dinner party, try adding a scoop of almond or cherry vanilla ice cream to really play up those subtle almond notes in the filling.
- This pie actually tastes better the second day as the flavors have time to meld and deepen
- Leftovers keep at room temperature for two days, though good luck having any last that long
- If you refrigerate it, let slices come to room temperature before serving for the best texture
 Save to Pinterest
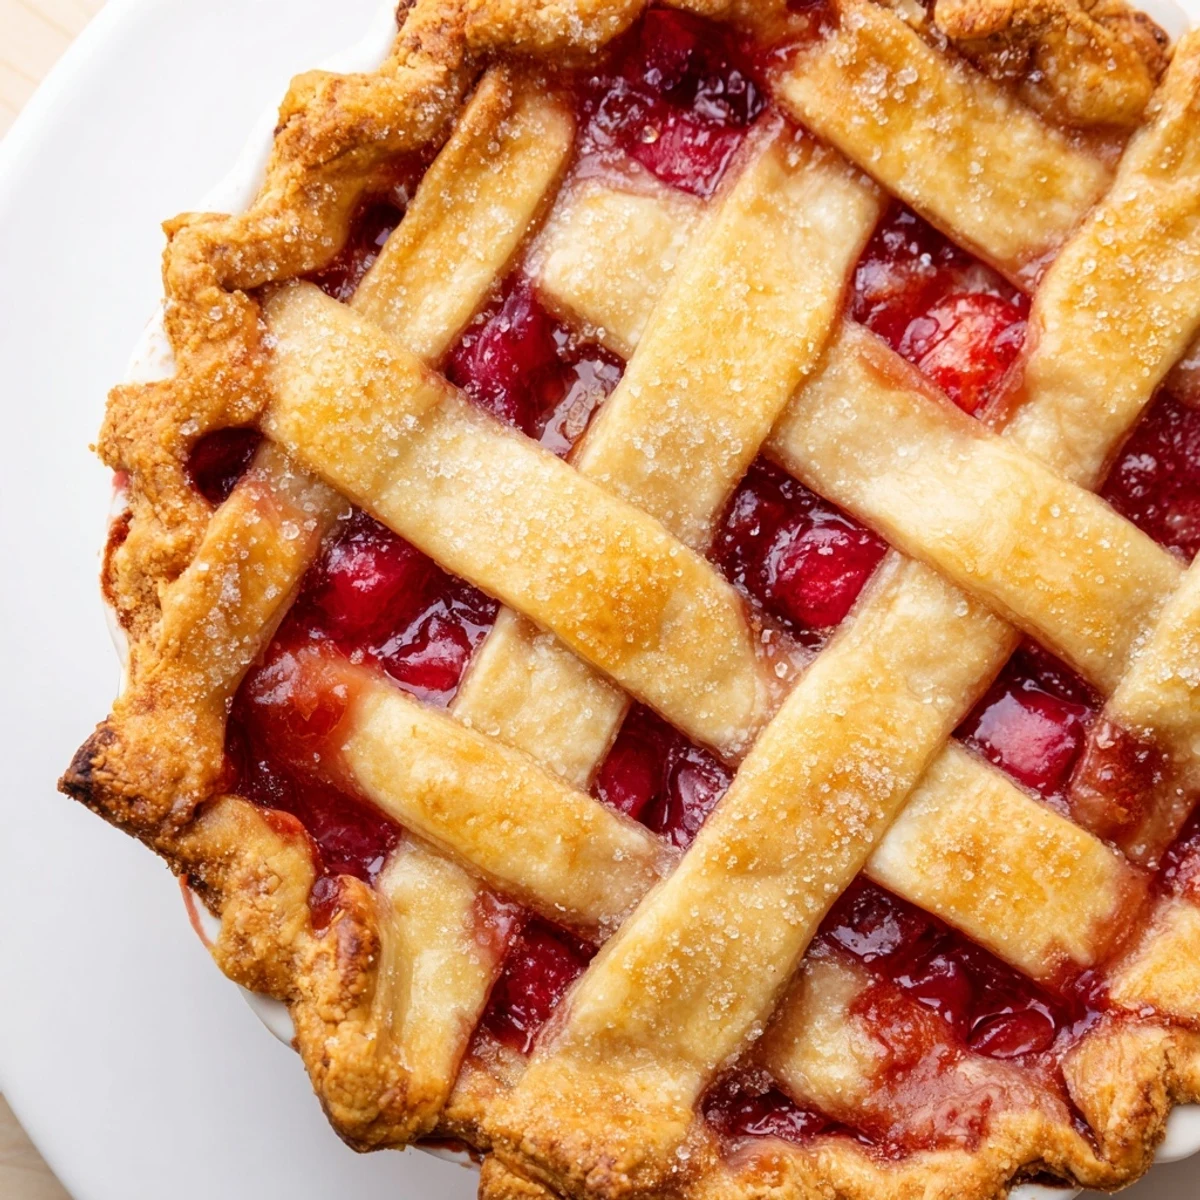
 There is something incredibly satisfying about pulling a golden bubbling pie from the oven and seeing that perfect lattice you wove with your own hands. Serve this to someone you love, maybe with a little extra ice cream on the side.
Recipe FAQs
- → How do I achieve a flaky lattice crust?
-
Use cold, cubed butter and avoid overworking the dough. Chill it before rolling and handle gently to keep the crust tender and flaky.
- → Can frozen cherries be used without thawing?
-
Yes, using frozen cherries directly helps retain their shape and prevents excess liquid in the filling.
- → What can enhance the cherry filling's flavor?
-
Adding lemon juice and a touch of almond extract balances tartness and adds depth to the cherry mixture.
- → How do I prevent a soggy crust bottom?
-
Ensure the dough is well-chilled, and avoid overfilling. Baking on a sheet helps even heat distribution for a crisp bottom.
- → What is the purpose of the egg wash?
-
Brushing the lattice and crust edges with egg wash before baking gives a glossy, golden finish and helps sugar adhere when sprinkled.
