 Save to Pinterest
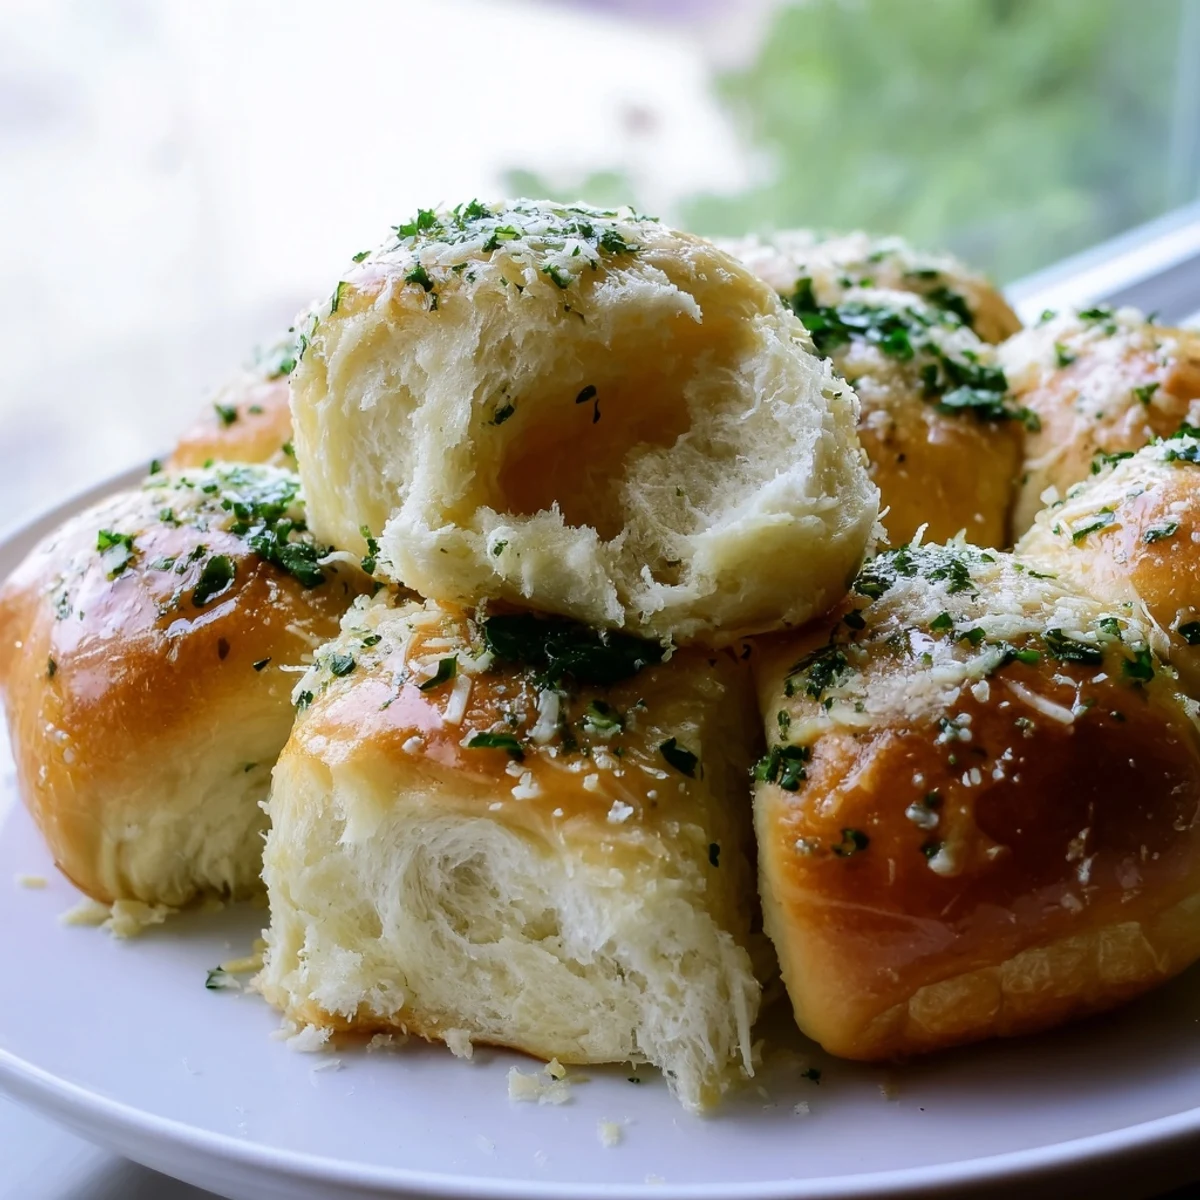
 These homemade garlic bread rolls feature pillowy soft dough swirled with a rich garlic-Parmesan butter filling. The dough rises to perfection, creating tender, airy interiors while the golden-brown tops are brushed with butter and sprinkled with fresh herbs.
What makes these special is the generous filling of fresh garlic, parsley, and aged Parmesan that gets rolled into each individual piece. As they bake, the aromatic butter melts through the dough layers, creating those irresistible garlicky pockets throughout.
The process is straightforward: mix the simple yeast dough, let it rise, fill with the flavored butter, roll into individual portions, and bake until golden. The result is restaurant-quality bread that pairs beautifully with pasta, soups, or enjoyed on their own as a satisfying snack.
Last winter, my apartment smelled like a Italian bakery for three straight days after I decided to perfect garlic bread rolls. The neighbors actually knocked on my door to ask what I was making, which turned into an impromptu dinner party where these rolls disappeared faster than I could bake them.
I made these for my sisters birthday dinner when she casually mentioned she'd kill for good garlic bread. The whole family went quiet when they hit the table, and now she requests them for every gathering, birthday or not.
Ingredients
- All purpose flour: This creates the perfect tender crumb while still giving you that satisfying pillowy texture
- Active dry yeast: Make sure your milk is warm but not hot, otherwise the yeast wont bloom properly and your rolls wont rise
- Warm milk: I heat it to about 110°F, think bathwater temperature, to activate the yeast without killing it
- Sugar: This feeds the yeast and helps the rolls develop that gorgeous golden brown color in the oven
- Salt: Do not skip this, it balances the sweetness and brings out all the garlic butter flavors
- Unsalted butter: I use unsalted so I can control the salt level in both the dough and the garlic butter filling
- Large egg: This adds richness and helps the dough hold its shape while rising
- Garlic cloves: Fresh minced garlic is non negotiable here, jarred garlic just does not have the same punch
- Fresh parsley: The bright herbal note cuts through the richness and makes the rolls look beautiful
- Parmesan cheese: This adds a salty, nutty depth that makes these rolls completely addictive
Instructions
- Wake up the yeast:
- Dissolve sugar in warm milk, sprinkle yeast on top, and watch it bubble up after about 10 minutes
- Mix the dough:
- Combine flour and salt in a large bowl, then add melted butter, egg, and that happy foamy yeast mixture until dough forms
- Knead it out:
- Work the dough on a floured surface for 8 to 10 minutes until it feels smooth and bounces back when you poke it
- Let it rise:
- Place dough in a greased bowl, cover it up, and leave it in a warm spot for about an hour until it is doubled in size
- Make the magic filling:
- Mix softened butter with minced garlic, parsley, salt, and Parmesan until you have a fragrant spread that tastes incredible
- Shape the rolls:
- Divide dough into 12 pieces, flatten each into a rectangle, spread with garlic butter, then roll tight and pinch the seal shut
- Second rise:
- Arrange rolls in your baking pan, cover, and let them puff up for another 20 to 30 minutes
- Bake golden:
- Brush with melted butter, add toppings, and bake at 350°F for 20 to 25 minutes until they are perfectly golden brown
 Save to Pinterest
 These rolls have become my go to contribution for potlucks because they travel well and reheat perfectly. Last Thanksgiving, my cousin confessed she ate three while they were still in the car on the way to our house.
Make Ahead Magic
You can prepare these rolls through the shaping step, cover the pan tightly, and refrigerate overnight. Let them sit at room temperature for 30 minutes before baking, and nobody will know you did not make them fresh that morning.
Freezing Instructions
After baking, let the rolls cool completely then wrap them individually in plastic and freeze in a freezer bag. Reheat in a 350°F oven for 5 to 7 minutes, and they will taste just like they came out of the oven.
Serving Suggestions
These rolls are perfect alongside pasta dishes, soups, or as a base for mini sandwiches. I have also served them as appetizers with a bowl of marinara sauce for dipping.
- Try adding chili flakes to the garlic butter if you like a little heat
- Swap parsley for chives or basil to change up the herb profile
- Make mini versions for party appetizers by dividing the dough into 24 pieces instead
 Save to Pinterest
 There is something incredibly comforting about pulling homemade bread from the oven, especially when it fills your whole kitchen with that warm garlic butter aroma. These rolls have become a staple in my kitchen, and I hope they find a permanent home in yours too.
Recipe FAQs
- → Can I make the dough ahead of time?
-
Absolutely. Prepare the dough through the first rise, then refrigerate it for up to 24 hours. Let it come to room temperature before shaping and filling with the garlic butter. This actually enhances flavor development.
- → What's the best way to store leftovers?
-
Store cooled rolls in an airtight container or zip-top bag at room temperature for up to 2 days. For longer storage, freeze individually wrapped rolls for up to 3 months. Reheat in a 350°F oven for 5-7 minutes to refresh.
- → Can I use dried herbs instead of fresh?
-
Fresh parsley provides the best flavor and texture, but you can substitute dried herbs in a pinch. Use one-third the amount of dried herbs compared to fresh. Avoid garlic powder—fresh minced garlic delivers the authentic taste that makes these rolls special.
- → Why didn't my dough double in size?
-
This usually means the yeast wasn't active or the environment was too cool. Ensure your milk is warm (105-110°F), not hot, which can kill yeast. Find a warm, draft-free spot for rising, or create a proofing box by placing the bowl near a preheating oven with the door slightly ajar.
- → Can I make these without a stand mixer?
-
Definitely. Knead by hand on a lightly floured surface for 10-12 minutes until the dough is smooth and springs back when pressed. The tactile method actually helps you understand the dough's texture and readiness. Let the dough rest briefly if it becomes too elastic while kneading.
- → How do I know when the rolls are done baking?
-
The rolls should be deep golden brown on top and sound hollow when tapped lightly on the bottom. An instant-read thermometer inserted into the center should read 190-200°F. The internal temperature ensures the dough is fully cooked through while remaining tender and moist.
