 Save to Pinterest
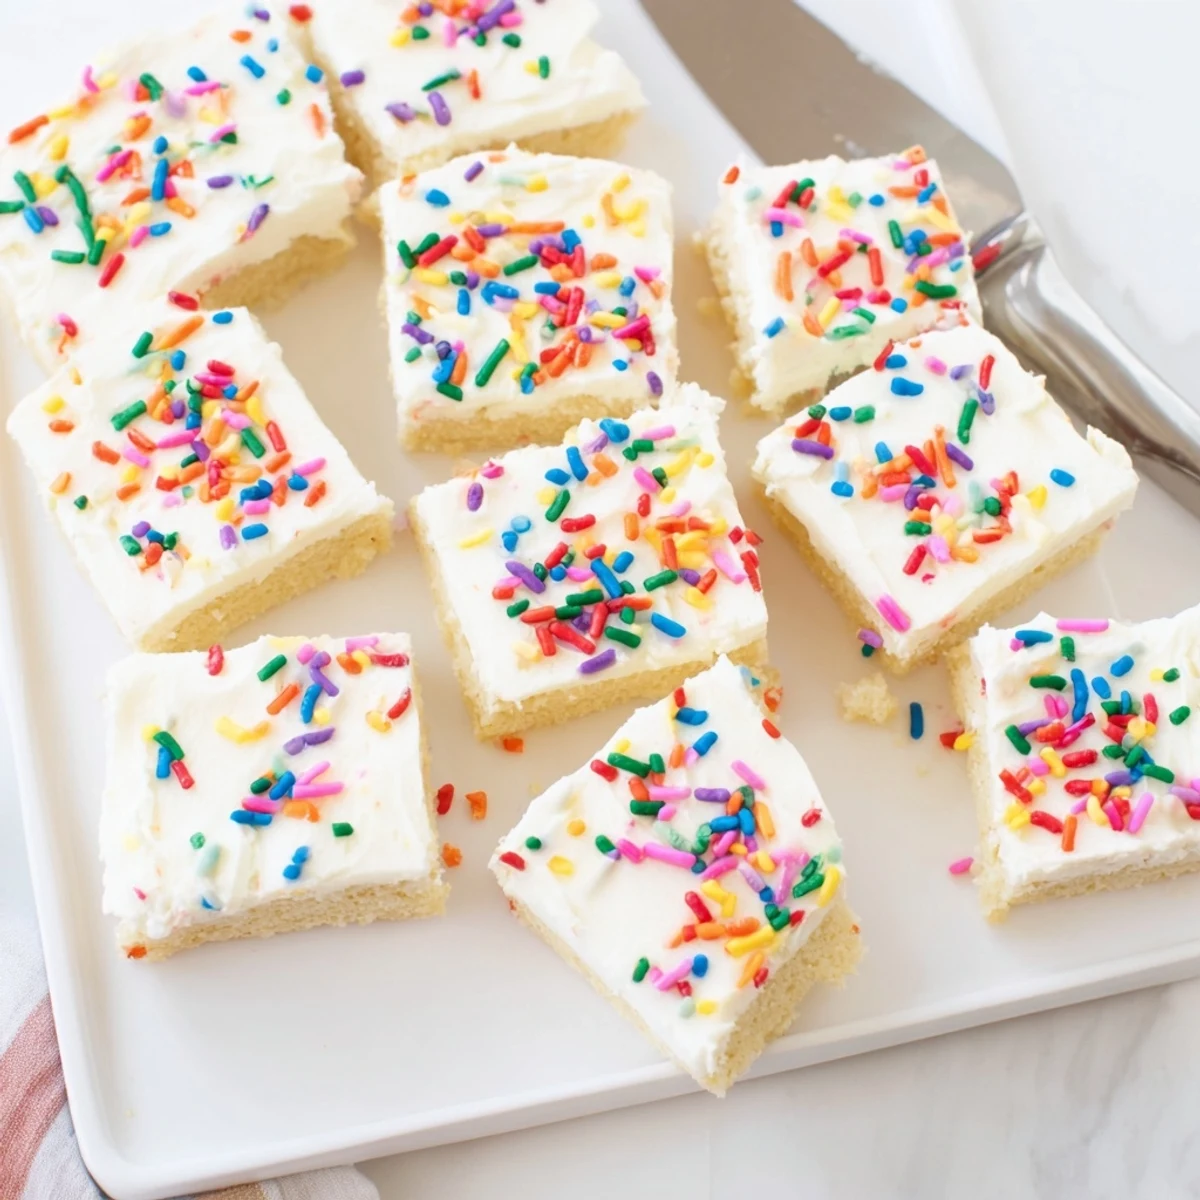
 These soft sugar cookie bars feature a tender, buttery base topped with silky vanilla frosting. Ready in just 40 minutes, they're simpler than individual cookies yet just as delicious.
The dough comes together quickly with basic pantry ingredients, then bakes into golden squares. The creamy frosting spreads beautifully and can be customized with any colors or sprinkles for occasions.
Perfect for birthdays, holidays, or potlucks, these bars stay moist for days and feed a crowd easily.
My neighbor brought over a plate of these frosted sugar cookie bars for a block party three summers ago, and I stood in my driveway eating three of them before I even made it back inside. The edges were golden, the frosting was piled on without apology, and they had that soft, chewy center that makes you forget about portion sizes entirely. I went home, closed the kitchen door, and reverse engineered them that same evening with flour dusted across my counter and vanilla on my fingers. They have been my go-to celebration dessert ever since, because sometimes a layer of frosting on a thick cookie bar is exactly what the moment calls for.
I made a double batch of these for my daughters school bake sale last spring and they sold out in the first fifteen minutes while the cupcakes sat untouched. Another parent texted me that evening asking for the recipe, and my daughter walked around for a week announcing that her mom made the best dessert at the whole sale. Small victories taste sweet, especially when they are covered in sprinkles.
Ingredients
- 2 1/4 cups (280 g) all-purpose flour: This gives the bars their sturdy but tender structure. Spoon it into the measuring cup and level it off to avoid dense bars.
- 1/2 teaspoon baking powder: Just enough lift to keep them soft without turning cakey.
- 1/2 teaspoon salt: Don't skip it, because salt makes the butter and sugar taste like more than the sum of their parts.
- 3/4 cup (170 g) unsalted butter, softened: Pull it out an hour ahead so it creams smoothly. Cold butter leaves lumps you will regret later.
- 1 cup (200 g) granulated sugar: Standard white sugar gives that classic clean sweetness and crisp edges.
- 1 large egg plus 1 large egg yolk: The extra yolk is my secret weapon for richness and chew.
- 2 teaspoons pure vanilla extract: Use the real stuff here since it is the primary flavor in both the cookie and the frosting.
- 1/4 cup (60 ml) whole milk: Just a splash to bring the dough together and keep it spreadable.
- 1/2 cup (115 g) unsalted butter, softened (for frosting): Beat it until it is pale and silky before adding sugar for the smoothest texture.
- 2 cups (240 g) powdered sugar, sifted: Sifting is nonnegotiable unless you enjoy lumpy frosting.
- 2 tablespoons whole milk (for frosting): Add gradually until you reach that perfect spreadable consistency.
- 1 teaspoon pure vanilla extract (for frosting): Double down on the vanilla flavor to tie the whole bar together.
- Food coloring and sprinkles (optional): Match them to any holiday, team colors, or just your mood on a Tuesday afternoon.
Instructions
- Set the stage:
- Preheat your oven to 350 degrees F and line a 9 by 13 inch baking pan with parchment, leaving the edges hanging over like handles. This is the trick that lets you lift the whole slab out cleanly for slicing.
- Whisk the dry:
- In a medium bowl, whisk together the flour, baking powder, and salt. Set it aside so it is ready when you need it.
- Cream butter and sugar:
- Beat the softened butter and granulated sugar in a large bowl until the mixture looks pale, fluffy, and lighter than you think it should be, about two to three minutes. Scrape down the bowl once so nothing hides at the bottom.
- Add the eggs and vanilla:
- Drop in the whole egg, the extra yolk, and the vanilla, then beat until everything is fully combined and the batter looks glossy and cohesive.
- Bring it all together:
- With the mixer on low, add the flour mixture and milk in alternating batches, starting and ending with the flour. Stop mixing the moment the last streak of flour disappears, because overmixing is the enemy of tender bars.
- Spread and smooth:
- Transfer the dough to your prepared pan and use an offset spatula to press it into an even layer. Take your time here, because an even layer means even baking and no thin overcooked corners.
- Bake until just right:
- Bake for 18 to 22 minutes until the edges are lightly golden and a toothpick in the center comes out with moist crumbs clinging to it. Pull them out before they look fully done, because they will continue to set as they cool.
- Cool completely:
- Leave the bars right in the pan on a wire rack and let them cool entirely. Frosting warm bars is a one way ticket to a melted mess.
- Make the frosting:
- Beat the softened butter until creamy, then gradually add the powdered sugar, milk, and vanilla, beating until the frosting is light and fluffy. Add food coloring now if you are feeling festive.
- Frost, slice, and serve:
- Spread the frosting in an even layer over the cooled bars, scatter sprinkles on top if using, then use the parchment overhang to lift the whole thing out. Cut into sixteen squares and watch them vanish.
 Save to Pinterest
 The first time I made these for a friend going through a rough patch, she called me the next morning to say she ate half the pan standing at her kitchen counter at midnight. That is when I realized these bars are not just a dessert, they are a small edible act of care that travels well and says what words sometimes cannot.
Storage That Actually Works
Keep the bars in an airtight container at room temperature for up to three days, though in my house they rarely survive past day two. If you need more time, layer them between sheets of parchment in the fridge for up to a week. Let them sit out for twenty minutes before serving so the frosting softens back to its proper texture.
Making It Your Own
Swap the vanilla extract in the frosting for almond or lemon extract and suddenly you have an entirely different dessert on your hands. I have stirred lemon zest into the cookie dough for spring gatherings and added a pinch of cinnamon for fall potlucks, both with excellent results. You can also use plant based butter and milk for a dairy free version that tastes almost indistinguishable from the original.
Tools You Will Be Glad You Have
A 9 by 13 inch pan, an electric mixer, and an offset spatula are the three things that make this recipe nearly effortless. The mixer saves your arm from the butter creaming, and the offset spatula makes spreading both the dough and frosting feel like a calm task rather than a wrestling match. Everything else is standard kitchen equipment you probably already own.
- Parchment paper with overhanging edges is the difference between beautiful bars and a crumbly mess stuck in the pan.
- A wire rack underneath the pan speeds up cooling significantly if you are in a hurry to frost.
- Wipe your knife clean between each cut for bakery worthy squares with sharp edges.
 Save to Pinterest
 Every batch of these frosted sugar cookie bars reminds me that the best desserts do not need to be complicated or fussy. They just need butter, sugar, and a willingness to spread frosting a little thicker than seems reasonable.
Recipe FAQs
- → Can I make these bars ahead of time?
-
Yes, you can bake the cookie base up to 2 days ahead. Store unfrosted bars tightly wrapped at room temperature. Frost and decorate within 24 hours of serving for best texture and appearance.
- → Why do I need both egg and egg yolk?
-
The extra yolk adds richness and creates a softer, more tender texture. Yolks contain more fat than whites, resulting in a denser, chewier bar that doesn't dry out.
- → How do I know when the bars are done baking?
-
The edges should be lightly golden, and a toothpick inserted in the center should come out with moist crumbs, not wet batter. Avoid overbaking as this creates dry, hard bars.
- → Can I freeze these frosted bars?
-
It's best to freeze unfrosted bars. Wrap tightly in plastic and foil for up to 3 months. Thaw overnight at room temperature, then frost and serve. Frosted bars don't freeze well as the texture changes.
- → What's the best way to get smooth frosting?
-
Ensure your butter is truly softened, not melted. Beat the powdered sugar gradually until no lumps remain. Use room temperature bars and an offset spatula to spread evenly without tearing the surface.
- → Can I use salted butter instead?
-
Yes, simply reduce the added salt in the cookie base by half. The frosting typically uses unsalted butter for better control over the final flavor balance.
