 Save to Pinterest
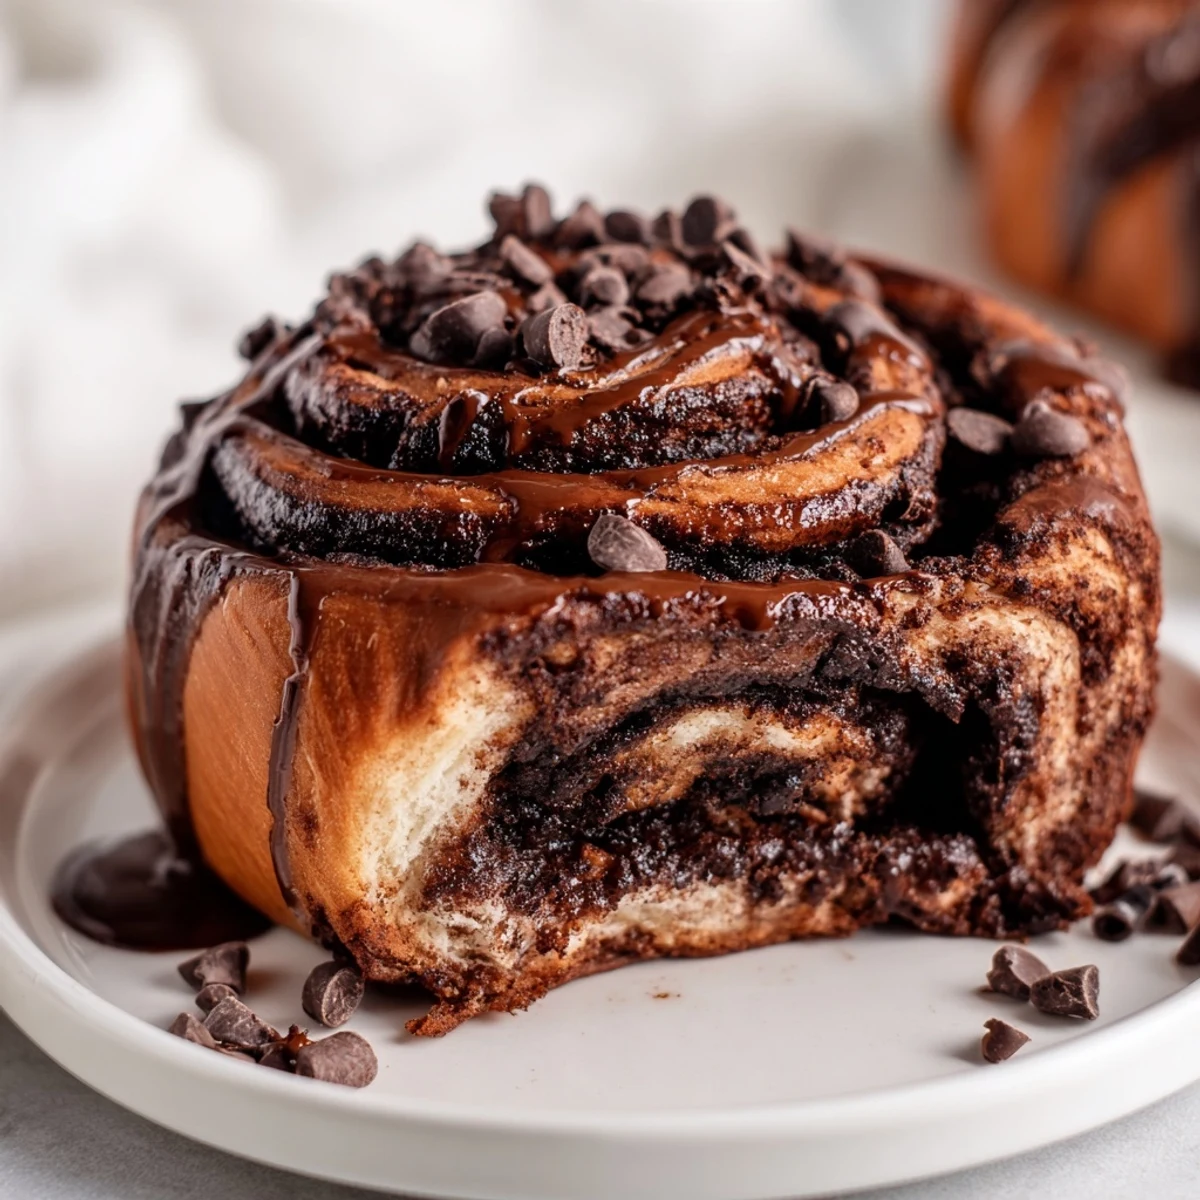
 These soft, fluffy cinnamon rolls feature cocoa-infused dough swirled with a sweet chocolate-cinnamon filling and dark chocolate chips. After rising until perfectly doubled, they bake until golden and finish with a decadent chocolate glaze that creates an irresistible chocolate-on-chocolate experience.
The dough combines cocoa powder with traditional ingredients for a tender, chocolatey base, while the filling layers brown sugar, cinnamon, more cocoa, and melted chocolate chips throughout each spiral. Make ahead by refrigerating overnight, then bring to room temperature before baking for fresh, warm treats.
The kitchen filled with this incredible aroma last weekend, chocolate and cinnamon swirling together in ways that made everyone wander in from different rooms. I had this idea bouncing around for months—what if cinnamon rolls could be more like a chocolate croissant met a gooey brownie? The first batch disappeared so fast I barely got to taste-test properly, which I think counts as a successful experiment.
I made these for my sister's birthday brunch, partly because she's the person who introduced me to the magic of chocolate in breakfast pastries years ago. She took one bite and went completely silent, which is her highest form of compliment. Now every time I see a package of chocolate chips at the grocery store, I remember how she used to sneak them into our morning pancakes when we were kids.
Ingredients
- All-purpose flour: The foundation that gives these rolls their structure while still staying tender after baking
- Unsweetened cocoa powder: Adds depth to the dough and creates that stunning dark color without making it overly sweet
- Instant yeast: Works faster than active dry yeast and gives reliable rises every single time
- Granulated sugar: Feeds the yeast and adds just enough sweetness to balance the cocoa
- Salt: Enhances all the chocolate flavors and keeps the dough from tasting flat
- Whole milk: Creates a richer, softer dough than water would, and the fat helps tenderize
- Unsalted butter: Essential for both the dough and filling, bringing that buttery richness we all want
- Large egg: Adds structure and helps the dough hold its shape while rising
- Brown sugar: The molasses in brown sugar creates a caramel-like quality in the filling
- Dark chocolate chips: Use good quality chocolate here since it really shines in the final bake
- Powdered sugar: Creates that silky smooth glaze that drips beautifully down the sides
Instructions
- Mix the dry ingredients:
- Combine flour, cocoa powder, yeast, sugar, and salt in a large bowl until everything is evenly distributed and the mixture looks uniformly dark
- Bring the dough together:
- Add warm milk, melted butter, and egg, mixing until a sticky dough forms that clings together but still feels tacky to the touch
- Knead until smooth:
- Work the dough by hand or stand mixer for 8 to 10 minutes until it transforms from shaggy to smooth and elastic, bouncing back when you press it
- Let it rise:
- Place in a greased bowl, cover, and let rise in a warm spot until doubled, which takes about an hour but trust your eyes more than the clock
- Roll out the dough:
- Punch down gently and roll on a floured surface into a 16x12-inch rectangle, keeping the thickness as even as possible
- Spread the butter:
- Coat the entire surface with softened butter, leaving just a small border around the edges
- Add the filling mixture:
- Mix brown sugar, cocoa powder, and cinnamon then sprinkle evenly over the butter, creating a dark chocolatey layer
- Scatter the chocolate chips:
- Distribute dark chocolate chips over the sugar mixture so every bite gets those melted pockets
- Roll and slice:
- Starting from the long edge, roll tightly into a log and slice into 12 equal rolls using a sharp knife or unflavored dental floss
- Second rise:
- Arrange in a greased baking dish, cover, and let rise until puffy and doubled, about 30 to 45 minutes
- Bake until golden:
- Bake at 350°F for 22 to 25 minutes until set and just lightly browned, being careful not to overbake
- Make the glaze:
- While rolls cool slightly, whisk powdered sugar, cocoa powder, milk, and vanilla until smooth and pourable
- Glaze and serve:
- Drizzle generously over warm rolls so the glaze melts into all those crevices and cracks
 Save to Pinterest
 My neighbor texted me the next day asking what that smell was, and I ended up bringing over a few leftover rolls. Now she asks about them every time we talk, which I think is the ultimate confirmation that this recipe is worth keeping in regular rotation.
Making These Ahead
You can absolutely assemble these the night before and refrigerate after slicing them into the baking dish. Just let them come to room temperature and rise for about an hour before baking. The dough actually develops more flavor this way, like a slow overnight rise gives everything more depth.
Getting The Perfect Swirl
Roll the dough tightly but not so tight that the filling squishes out. A gentle but firm roll creates those beautiful distinct layers. Use unflavored dental floss to slice the rolls—just slide it underneath, cross the ends over the top, and pull through. It gives you the cleanest cuts without squishing the dough.
Serving Suggestions
These are fantastic on their own but become something special with a few simple additions. Fresh berries cut through the richness, vanilla ice cream turns them into dessert, and a cup of strong coffee makes the chocolate flavors sing even more.
- Serve warm but not piping hot so the filling has a moment to set slightly
- Store any leftovers in an airtight container and reheat briefly in the microwave
- The glaze firms up as it cools but softens again with just 10 seconds in the microwave
 Save to Pinterest
 There's something about pulling a pan of these from the oven that just makes the whole house feel warmer. Hope they become as loved in your kitchen as they have in mine.
Recipe FAQs
- → Can I prepare these rolls the night before?
-
Yes, complete through slicing and arranging in the baking dish, then cover tightly and refrigerate overnight. Let them sit at room temperature for about 1 hour before baking to allow the dough to warm and rise properly.
- → How do I know when the dough has risen enough?
-
The dough should double in size during the first rise, taking about 1 hour in a warm place. For the second rise after shaping, the rolls should look puffy and fill the baking dish, typically 30–45 minutes.
- → Can I use different types of chocolate in the filling?
-
Absolutely. Dark chocolate chips add richness, but milk chocolate or semi-sweet chips work beautifully too. Chopped baking chocolate creates delicious melted pockets throughout the swirls.
- → Why is my dough sticky after mixing?
-
Sticky texture is normal for this enriched dough due to the cocoa powder and butter. Kneading for 8–10 minutes develops gluten structure, making it smooth and elastic. Add just 1 tablespoon of flour at a time only if necessary to handle.
- → How should I store leftover rolls?
-
Store cooled rolls in an airtight container at room temperature for up to 2 days. For longer storage, wrap individually and freeze for up to 3 months. Reheat gently in the microwave for 15–20 seconds.
- → Can I make these without a stand mixer?
-
Yes, knead by hand on a lightly floured surface for 10–12 minutes until smooth and elastic. The dough should spring back when poked lightly with your finger.
